Guide for Match
Step 1: Receive email or text
Step 1: Receive email or textStep 2: Preview the process
Step 2: Preview the processStep 3: Select document type
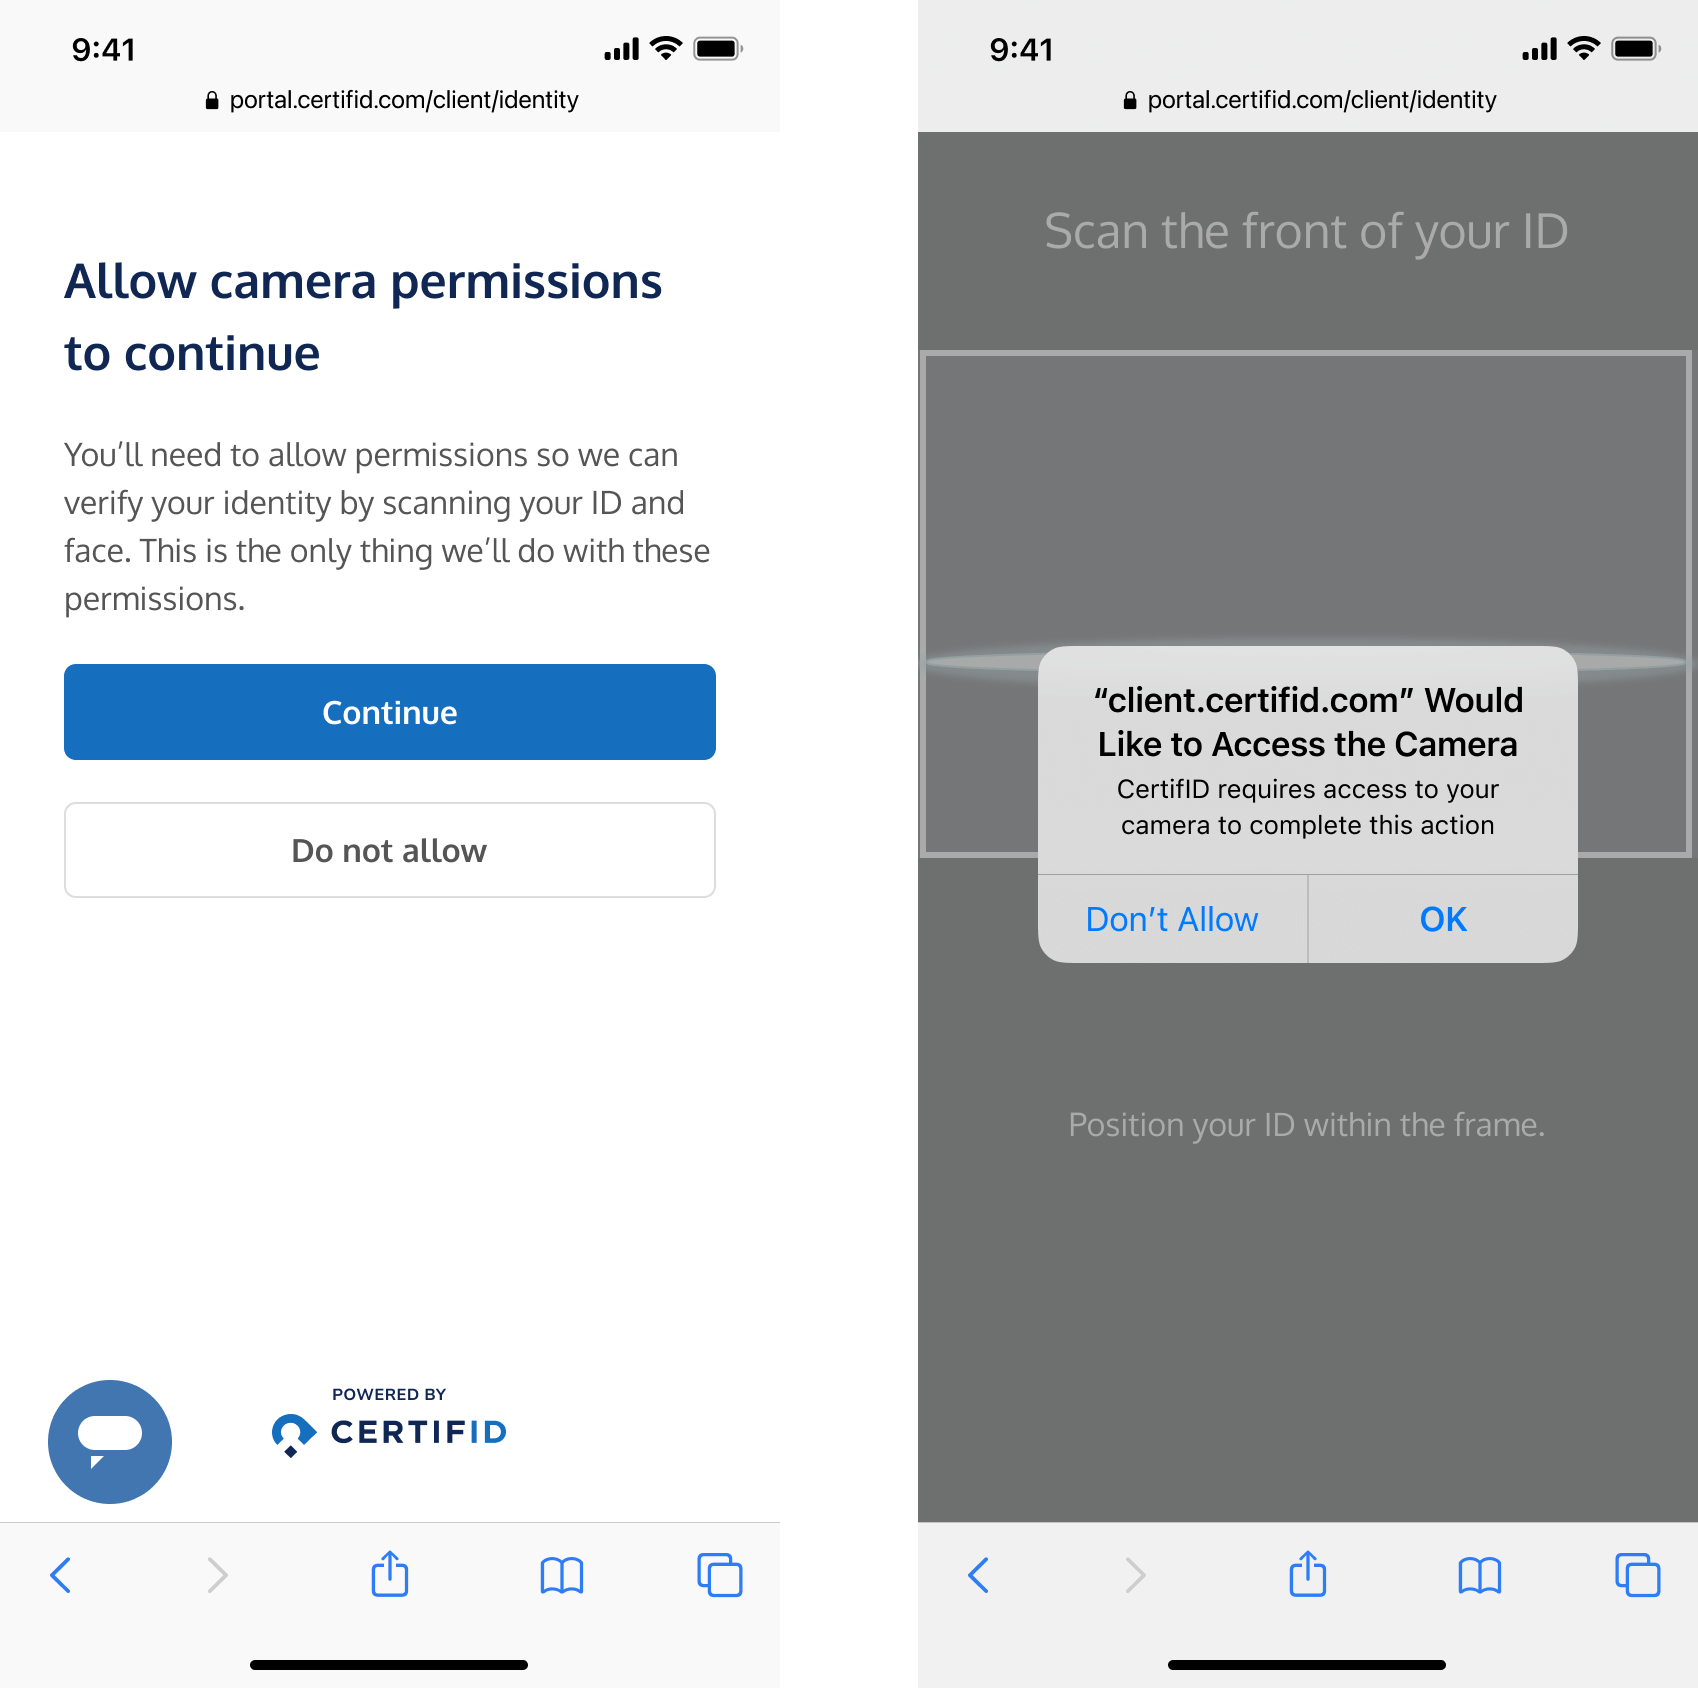
Step 3: Select document typeStep 4: Allow permissions
Step 4: Allow permissionsStep 5: Scan front and back of ID
Step 5: Scan front and back of IDStep 6: Scan face
Step 6: Scan faceStep 7: Verification ended
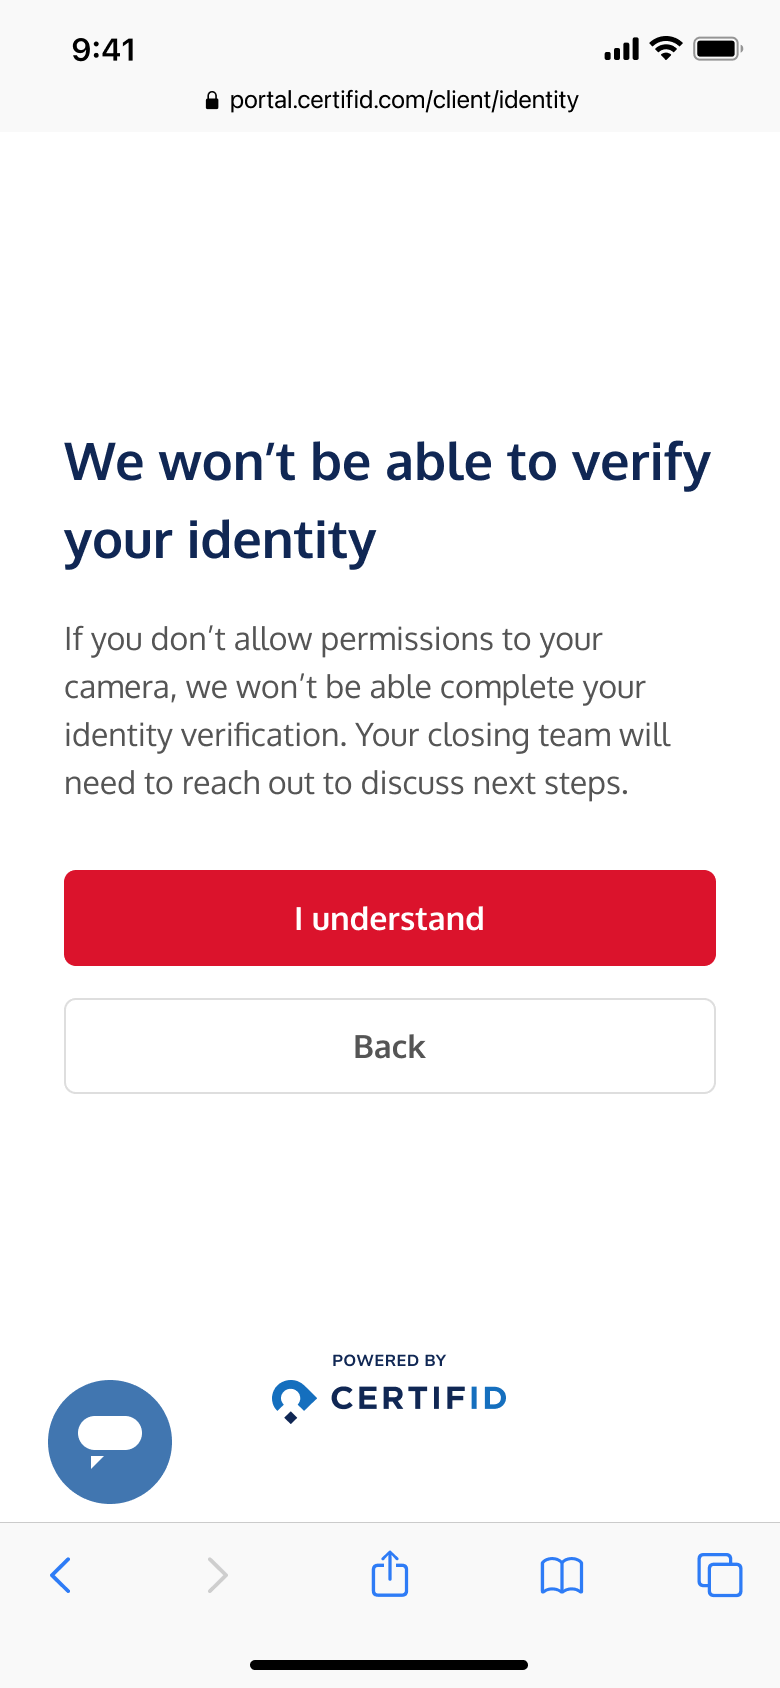
Step 7: Verification endedStep 4: Allow permissions
Your client will then be prompted to allow camera permissions so they can continue to scan their ID.
If they do not allow the camera permissions, the verification will end. The sender will then be notified that the verification has ended.