Guide for Match
Step 1: Receive email or text
Step 1: Receive email or textStep 2: Preview the process
Step 2: Preview the processStep 3: Select document type
Step 3: Select document typeStep 4: Allow permissions
Step 4: Allow permissionsStep 5: Scan front and back of ID
Step 5: Scan front and back of IDStep 6: Scan face
Step 6: Scan faceStep 7: Verification ended
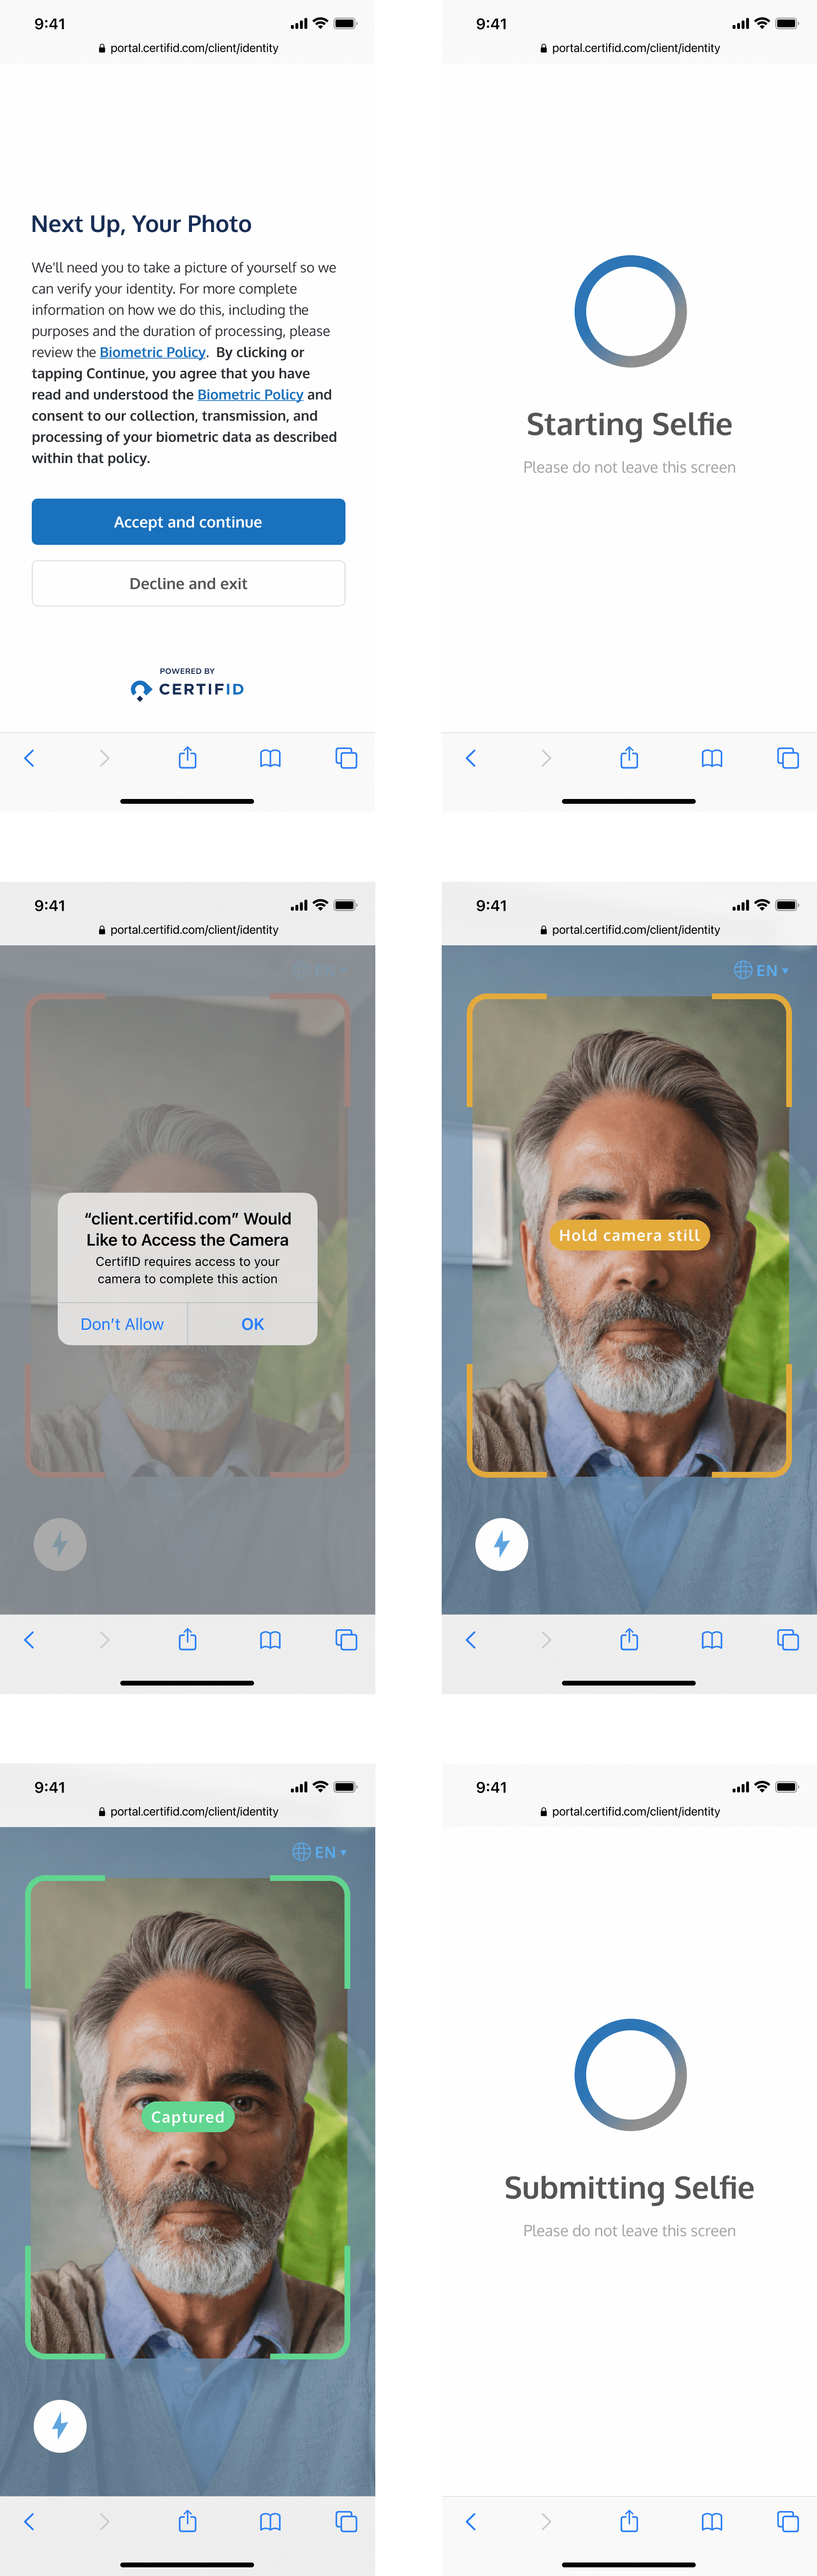
Step 7: Verification endedStep 6: Scan face
Next, your client will be presented with a biometric policy that they need to accept. Once accepted, they can proceed to take a selfie, which will be matched with the photo on their ID.
In the case where we are unable to process or successfully capture content on the ID, end users will be able to redo the capture process a second time on the same request. The customer will be presented with the following screen:

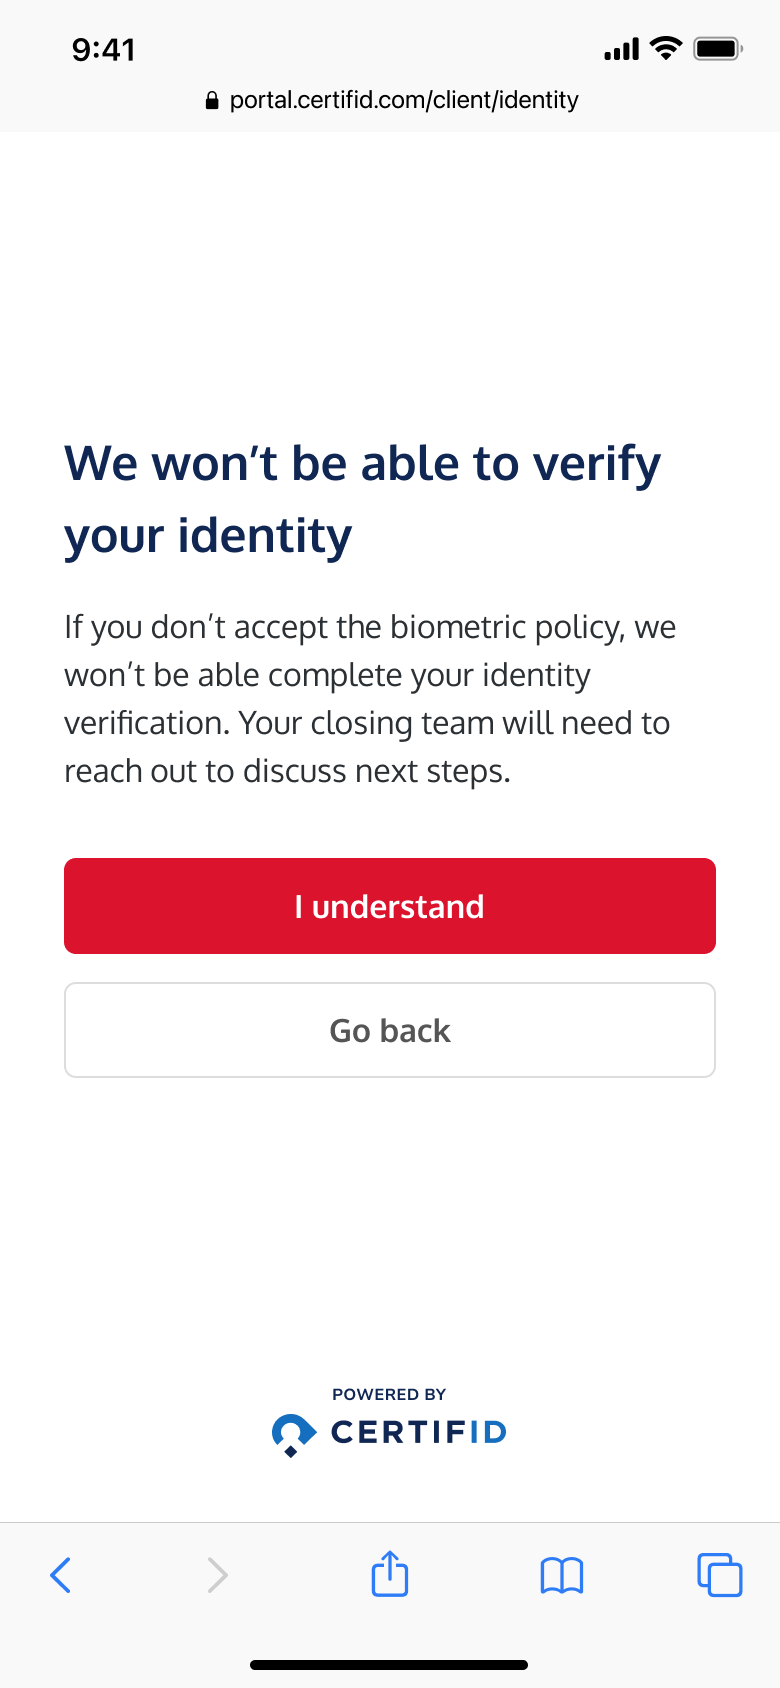
If they decline the biometric policy, the verification process will end.